|
| |
|
| |
Introduction |
|
| |
This chapter provides an overview of the parameters and functions you need to achieve optimum visual quality for your packaging and your project. |
|
| |
|
|
| |
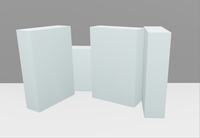
Issue #1: My object looks flat and has no shadow |
|
| |
| |
| |
|
|
|
|
|
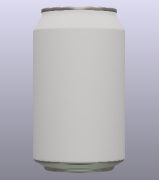
You have this |
|
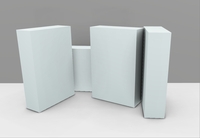
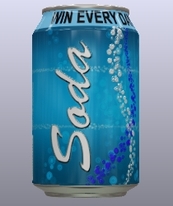
You want this |
|
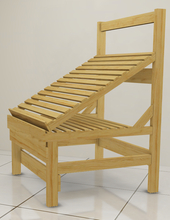
You haven't imported your models with shadow fields enabled.
If you want your 3D objects to have a photo-realistic visual quality within your project, you must import your models with the shadow fields activated.
For more information on how to activate shadows, please refer to the Importing products page of the How-to guide or page 44 of the manual. |
|
| |
|
|
|
| |
| |
|
|
|
|
|
You have this |
|
You want this |
|
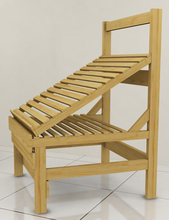
You have not imported your model with ambient lighting.
Depending on the shape of your 3D objects, you may also need to activate and adjust these parameters.
For more information on how to activate ambient lighting, please see the Importing products page in the quickstart guide or page 44 of the manual. |
|
| |
|
|
|
| |
| |
|
|
|
|
|
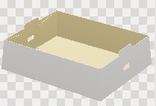
You have this |
|
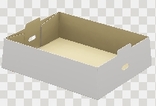
You want this |
|
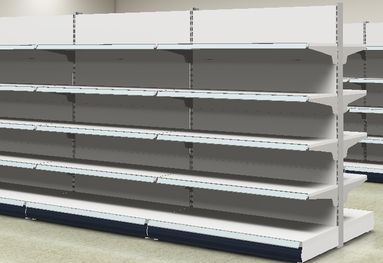
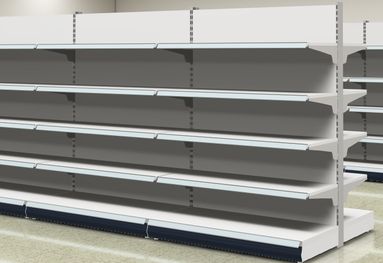
To enhance the realism of shelves and other large 3D models, you can click on Adjust for shelf lighting button.
For more information on how to activate shelf lighting, please refer to page 44 of the manual.. |
|
|
| |
|
| |
|
| |
|
| |
Issue #2: The simulation looks pixelated and flickers a lot |
|
| |
| |
|
|
|
| |
|
|
|
| |
You have this |
You want this |
|
|
| |
You need to adjust the antialiasing settings in Store Visualizer's Preferences.
To access the Preferences page, right-click on the rendering surface. The main context menu will appear. Select File > Preferences. The Preferences window appears.
Select 3D settings > Quality and performance> Antialiasing filter.
For an explanation of how to activate anti-aliasing, please refer to page 209 of the manual.
The type and quality of antialiasing filter used will reduce the jagged edges of the rendering. Antialiasing will significantly increase rendering quality, but its use may reduce performance.
Note: Antialiasing options are graphics card dependent. |
| |
|
| |
|
| |
Issue #3: My object looks like plastic after import |
|
| |
| |
| |
|
|
|
|
|
You have this |
|
You want this |
|
Some 3D models from CAD programs may not retain their materials when imported. You can then rework each material individually in Store Visualizer.
It's the adjustment and quality of the materials used in your 3D models that will bring photo realism to your products. If you are unable to adjust your materials correctly, you can use the predefined materials available with Store Visualizer. For further information on materials, please refer to the Material editor chapter. |
|
|
| |
|
| |
|
| |
|
| |
Issue #4: My object floats above another object |
|
| |
| |
| |
|
|
|
|
|
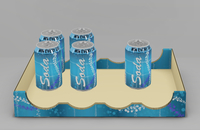
You have this |
|
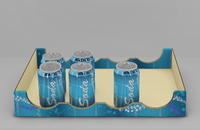
You want this |
|
You've activated physics and yet your cans float above the POS.
You haven't correctly set the collision envelope for the POS. For this type of object, you need to use a decomposed envelope in planar quality.
For further explanations of collision envelopes, go to the Physics page of the Practical Guide or from page 150 of the manual.
NB: This situation can also lead to expulsion of the object. |
|
|
| |
|
| |
|
| |
|
| |
Issue #5: My simulation is slow. What can I do? |
|
| |
|
|
| |
Make sure your computer meet the minimum requirements for Store Visualizer |
|
| |
Store Visualizer requires a high-performance computer to properly simulate fully 3D environments! Compare your computer's performance with the minimum requirements below
https://esko.my.site.com/s/article/Store-Visualizer-System-Requirements?language=en_US |
|
| |
|
|
| |
|
|
| |
Update the new graphic card driver |
|
| |
It is very important to make sure that your graphics drivers are up to date. Please visit the website of your graphics card or computer manufacturer to get the latest graphics drivers for your system. On Apple Mac computers, please use the Apple software updates to get a latest graphic drivers. |
|
| |
|
|
| |
|
|
| |
Check your Graphics memory usage jauge |
|
| |
| |
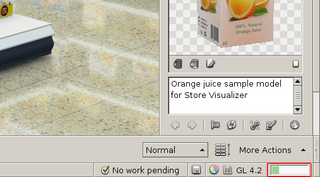 |
Located in the bottom right-hand corner of the Store Visualizer interface, this gauge indicates the graphic memory consumption of your project. The more graphic memory your project consumes, the more the gauge fills up, gradually turning red.
It's the textures of your models and the environment that increase graphics memory requirements.
Note: modern graphics cards offer 8 to 48 GB RAM. |
|
|
| |
|
|
| |
|
|
| |
Check the complexity of your 3D model |
|
| |
If the show complexity function is enabled, a model complexity gauge will appear in front of every 3D model in the library. This gauge represents the geometrical complexity of the model. |
|
| |
| |
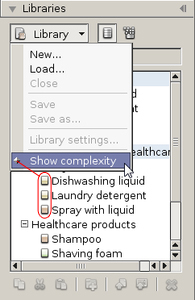 |
Complexity is a function of the amount of polygons in the model and also depends on the visual effects used (for example transparency). The higher the complexity of the model, the more the gauge will fill up and become red. Adding many complex models to your 3D environment may negatively impact rendering performance.
It is very important to create well optimized 3D models in your CAD application ! Models should use the amount of polygons needed for the required quality, but no more. Adding more polygons will not improve visual quality, but can significantly degrade rendering performance. Many 3D models available on the Internet as part of generic 3D libraries are not well suited for realtime simulation.
For further explanation, please turn to page 216 of the manual. |
|
|
| |
|
|
| |
|
| |
|
|
© Copyright 2025 VTales graphics - All rights reserved.
|